How To Change Your App Store Country
Here is how to Change App Store Country on iPhone or iPad, in case you are moving to a new Country or want to download Apps, Music, Books and Movies available in another Country or Region.
Change App Store Country on iPhone
As you must have noticed, certain Apps, Music, Books and Games are geared towards an audience in specific Countries and they may not be available for download in all Countries.
Also, sometimes Countries have their own fair and unfair reasons for placing restrictions on content, which actually ends up driving people to access restricted content using a VPN service.
However, the most common reason for people wanting to change App Store Country is to be able to download content which is first made available in the United States, before making its way to other places in the World.
What to Do Before Changing Apple Store Country
You won't be able change App Store Country, if a subscription for any Apple Service is linked to your Apple ID or you have Store Credits remaining in your Account.
In such cases, you will have to spend all the Store Credits remaining in your account and cancel subscriptions for Apple Services linked to your Apple ID.
Also, you will have to wait for memberships, pre-orders, movie rentals and season passes to complete.
If you have a subscription for iCloud Storage, you will have to temporarily downgrade to Free iCloud Storage plan, until you are able to switch to New Country or Region.
The only way to avoid these complications is to Create a New Apple ID and associate the New Apple ID with the new Country.
What Happens When You Change App Store Country
When you change App Store Country, your Payment and Billing information for all Apple services linked to your Apple ID will be updated.
This means that your existing Payment and Billing information will be removed and replaced by the New Payment and Billing Information.
If you do not want to lose your existing Payment and Billing information, you will have to Create a New Apple ID for use in another Country.
This will allow you to use both your existing Apple ID with its associated Country, Shipping Address, Payment info and also your New Apple ID associated with a different Country, Address and Payment Info.
Steps to Change App Store Country On iPhone or iPad
Follow the steps below to change App Store Country on your iPhone or iPad.
1. Open Settings > tap on your Apple ID Name.
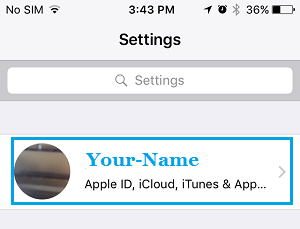
2. On Apple ID screen, tap on iTunes & App Store.

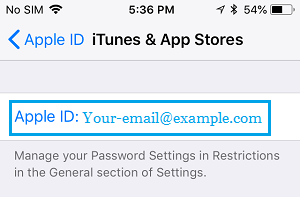
3. On the next screen, tap on your Apple ID
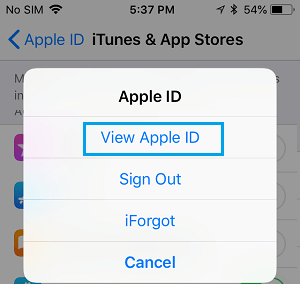
4. On the pop-up that appears, tap on View Apple ID.
5. If prompted, sign-in to iTunes & App Store by entering your Apple ID password.
6. On the next screen, tap on Country/Region
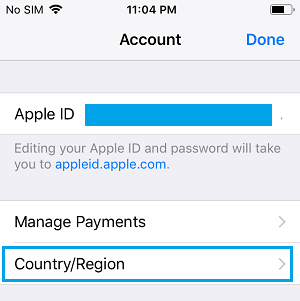
7. On the next screen, tap on Change Country or Region.
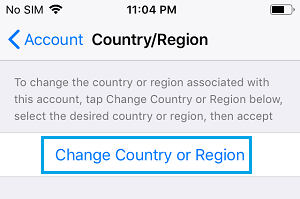
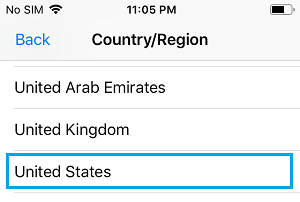
8. On Country/Region screen, select the Country of your choice.
9. On Terms & Conditions screen, tap on Agree > on the pop-up, tap on Agree to confirm.
10. On the next screen, select your Payment Method > provide Billing Name, Address, Phone Number and tap on Next.
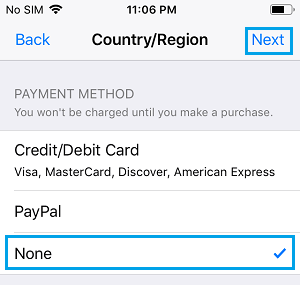
You can select the None option, if you have a Gift card or do not want to setup a Payment Method as yet for another Country.
Note: On the Country/Region screen, you can enter your current Phone Number, but the Shipping Address needs to be an Address from the Country that you have selected.
11. Once you tap on Next, you will be prompted to verify your Apple ID.
Once your Apple ID is verified, you will be redirected to Congratulations page. Tap on the Done option located at top-right corner of your screen to save the settings.
- How to Stop AutoPlay Videos in App Store On iPhone
- How to Redeem iTunes Gift Card on iPhone, iPad and PC
How To Change Your App Store Country
Source: https://www.techbout.com/change-app-store-country-iphone-ipad-5231/
Posted by: brownwifigh.blogspot.com

0 Response to "How To Change Your App Store Country"
Post a Comment